
REVIEW · CAVE & CANYON HOT SPRINGS
Waitomo Glow Worm Caves & Te Puia – Rotorua’s Geothermal Valley
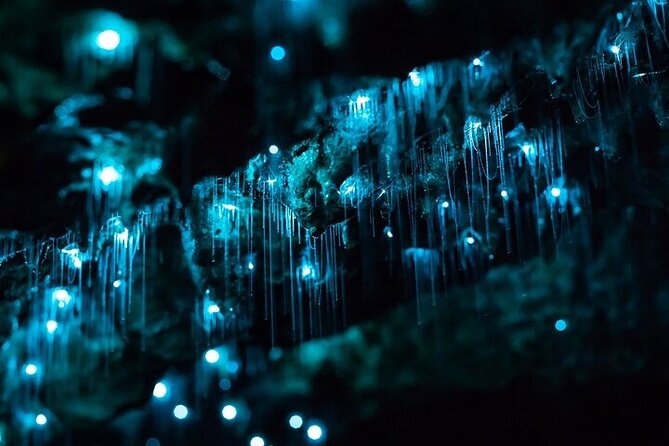
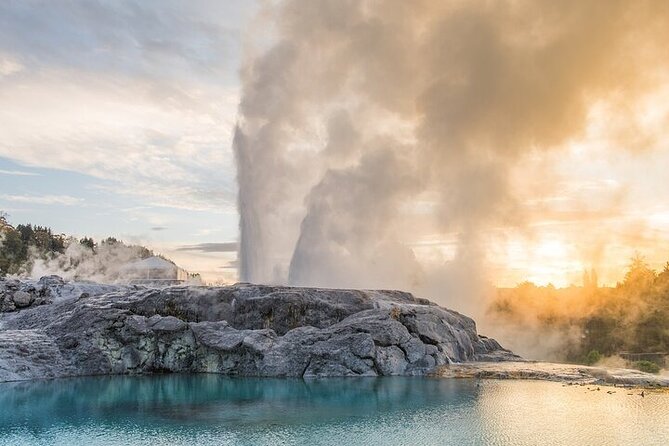
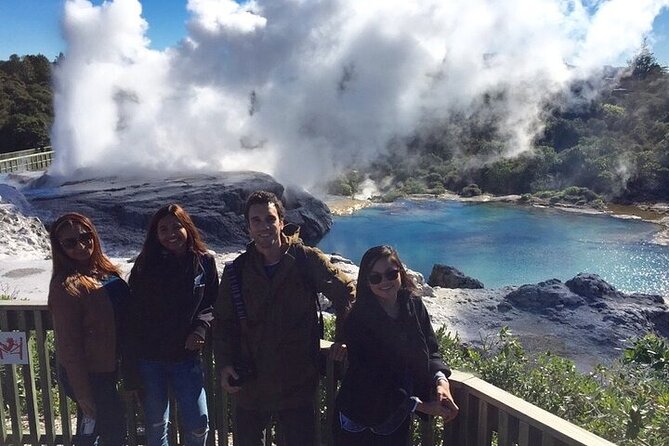
The day’s best moment comes underground, as your boat moves through the Waitomo River beneath a ceiling dotted with tiny natural lights. Above ground, Pohutu Geyser gives you a very different show, with steam, boiling mud, and bursts of geothermal energy at Te Puia.
I like the way this trip links two major sights without making you arrange several tickets or transfers. I also like the small group size, capped at 19 people, and the practical extras: pickup, bottled water, snacks, WiFi, and a driver-guide such as Adele, who has been singled out for excellent service.
The trade-off is simple: this is a very long day on the road, beginning at 6:00 am and lasting about 12 hours. You will see a lot, but you will not have much free time at either destination, and lunch is not included.
Key points at a glance
- Waitomo combines a cave walk with a flat-bottom boat ride, taking you into the Glowworm Grotto rather than stopping at a viewpoint.
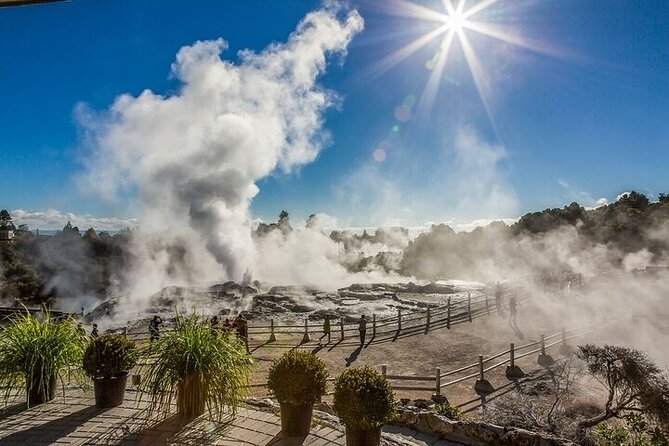
- Te Puia packs geothermal sights and Māori culture together, including Pohutu Geyser, mud pools, a Māori village, and the carving and weaving institute.
- The 6:00 am Auckland pickup makes this a full-day commitment, with a 2.5-hour drive to Waitomo and about two hours onward to Rotorua.
- The small maximum group of 19 matters, since the guide can manage a more personal road trip than a large coach outing.
- The $284.84 price includes the major costs, including transport, entry tickets, guided tours, snacks, water, and Auckland city-center pickup and drop-off.
- Plan your own lunch, since food beyond the supplied snacks is not included.
Why this Auckland day trip works
Auckland makes a good base for northern New Zealand, but Waitomo and Rotorua are far enough away that visiting both in one day takes planning. This tour solves that problem with one vehicle, one booking, and a guide who handles the driving between the two destinations.
You leave Auckland City Center at 6:00 am. That early start is not decorative. The drive to Waitomo takes about 2.5 hours, and the trip then continues for another two hours to Rotorua before the return to Auckland. If you want both sights and have only one day available, the schedule is useful. If you prefer slow mornings and long café stops, it will feel demanding.
The vehicle is air-conditioned and includes WiFi, bottled water, and snacks. Those details matter on a road day of this length. You also get hotel pickup and drop-off in Auckland City Center, so you do not need to find your own way to a distant departure point.
The group limit is 19 people. That is still a group outing, but it is more manageable than a full-size coach. You will spend much of the day with the same driver-guide, making that person an important part of the experience. Adele is the named guide associated with the strongest praise, so if she is leading your departure, you can expect a guide who has been described as outstanding.
More Cave and Canyon Hot Springs in New Zealand:
- Taupo: Orakei Korako Geothermal Park and Cave Entry Ticket
★ 4.6 · 158 reviews - Lake Rotoiti Evening Kayak Tour including Hot Springs, Glowworm Caves and BBQ Dinner
★ 5.0 · 60 reviews - Krabi: Tiger Cave Temple, Emerald Pool and Hot Springs Tour
★ 4.8 · 3,616 reviews
The road south through Waikato
The first major part of the day is the drive from Auckland to Waitomo. It takes around 2.5 hours through the Waikato region, so you should think of the vehicle as your base for much of the morning.
The tour includes snacks and a warm drink or snack stop at the Waitomo café, according to the schedule. That gives you a chance to get your bearings before entering the cave. Still, do not treat this as breakfast and lunch provided for the whole day. Lunch is specifically not included, so you should plan for that cost and make sure you are ready for a long stretch between Auckland and Rotorua.
This driving time can be a benefit if you want a guide to connect the two areas. It is less appealing if you are already planning to spend several days around Rotorua and could visit Waitomo separately at a slower pace. The value here comes from convenience, not from free time.
Inside the Waitomo Glow Worm Caves
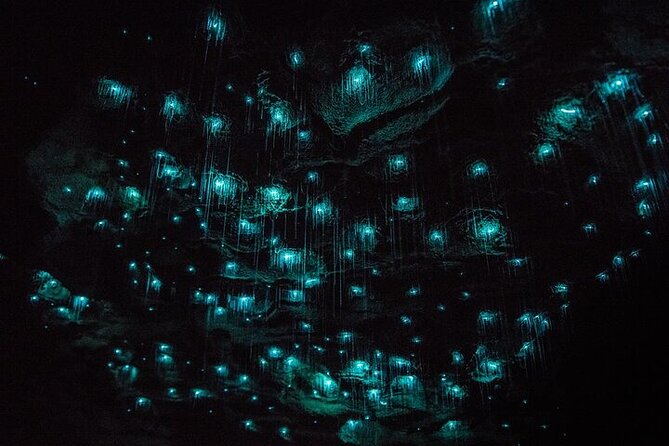
Waitomo is the first major stop, with about one hour set aside for the guided Glow Worm Caves experience. You walk through the cave with a guide, learning about its formation, history, and importance before reaching the river section.
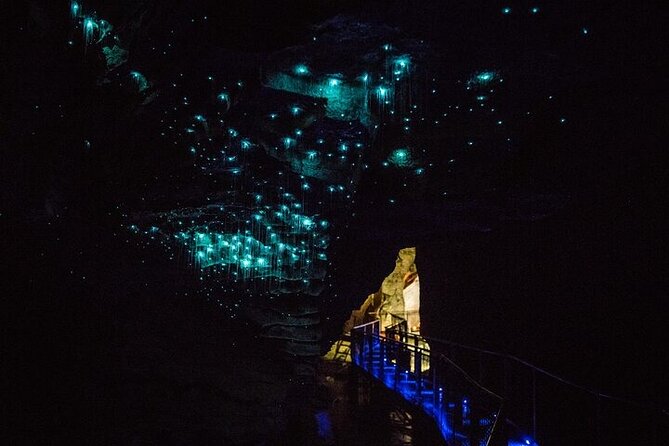
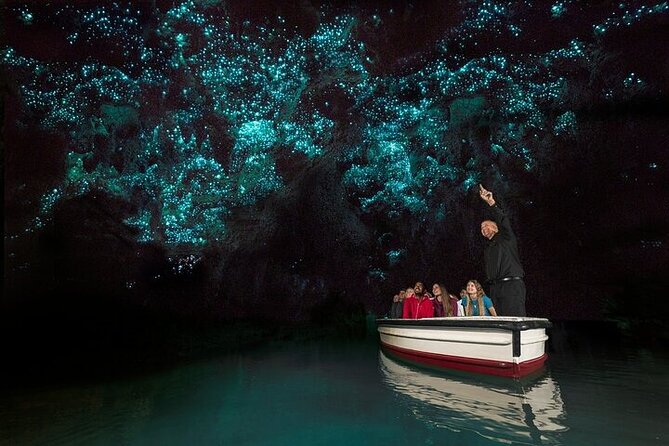
The main attraction is the Glowworm Grotto. New Zealand’s glowworms create points of natural light overhead, giving the cave its famous starry appearance. The effect is best understood as a natural display rather than a manufactured attraction. The cave does not need added decoration. Its appeal comes from the dark rock, underground water, and living lights above you.
The boat portion is especially important. You board a flat-bottom boat and glide along the Waitomo River, looking up at the glowing creatures. This is not simply a short walk past a lit wall. The boat gives you a different angle and lets the grotto open above you as you move through it.
The guided format also adds useful context. You are not left to work out the cave’s significance on your own, and the guide explains what you are seeing as the visit progresses. The time is limited, though. About an hour is enough for the signature cave visit, not for a relaxed day exploring the wider Waitomo area.
Expect the Waitomo section to be focused and structured. You will not have a large block of independent time, but that is part of what keeps the combined Auckland, Waitomo, and Rotorua schedule possible.
The two-hour transfer to Rotorua
After Waitomo, you return to the air-conditioned vehicle for the drive to Rotorua. This leg takes about two hours, followed by the Te Puia visit.
The transfer is practical, but it is also the point at which the day’s pace becomes clear. By this stage, you will have already spent several hours traveling and toured an underground cave. You may appreciate the chance to sit back, use the onboard WiFi, or have a snack. You should also keep your expectations realistic: this is a sightseeing circuit with long road sections, not a relaxed regional tour.
The driver-guide is central here. A good guide can make the miles feel purposeful by explaining the places along the way and keeping the day organized. The tour’s strongest individual praise goes to Adele, who was described as an outstanding guide and driver. Guide assignments can vary, so that name should not be treated as a guarantee for every departure, but it shows how much the quality of the day depends on the person behind the wheel.
More Hot Springs and Thermal Baths in New Zealand:
- Rotorua: Wai-O-Tapu Geothermal Park Entry Ticket
★ 4.6 · 2,601 reviews - Rotorua Rafting: Kaituna River White Water Rafting & Free Sauna
★ 5.0 · 1,952 reviews - Rotorua: Hell’s Gate Outdoor Mud Spa & Guided Walk
★ 4.7 · 1,140 reviews - Rotorua Rafting: Kaituna River Rafting Experience-Free Sauna
★ 4.9 · 401 reviews
Te Puia and the power of Pohutu Geyser
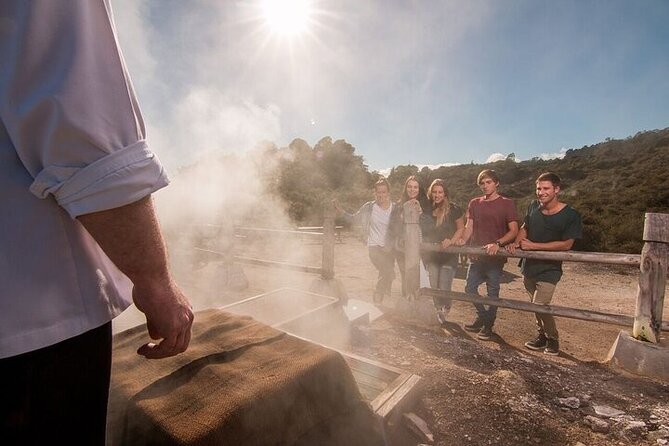
Te Puia is the second major stop, with about 1.5 hours for admission and a guided visit. It brings several Rotorua themes together in one place: geothermal activity, Māori culture, native wildlife, and traditional arts.
The star attraction is Pohutu Geyser, described as the largest geyser in the Southern Hemisphere. Seeing it gives the Rotorua portion a strong sense of place. Steam, hot water, and changing geothermal activity make the valley feel active rather than static.
You also visit boiling mud pools. These offer a different kind of geothermal spectacle from the geyser. Instead of a dramatic vertical eruption, the mud moves and bubbles with steady heat from below. The contrast makes the stop more interesting: one site gives you sudden force, while the other shows constant motion.
The schedule also includes a Māori village. This matters because Te Puia is not only a geothermal park. The visit connects the area’s natural features with Māori culture, giving you more context than a quick stop at a hot pool or geyser lookout.
The 1.5-hour window is useful for seeing the main features, but it is not generous. You will need to follow the guided route and keep moving. If you want extended time for every display, a long independent walk, or a slow visit to each cultural area, this tour may feel compressed.
Carving, weaving, and kiwi viewing
The National Carving and Weaving Institute adds a human element to the geothermal visit. You can see traditional Māori arts placed within a working educational setting rather than treating culture as a separate performance added onto the day.
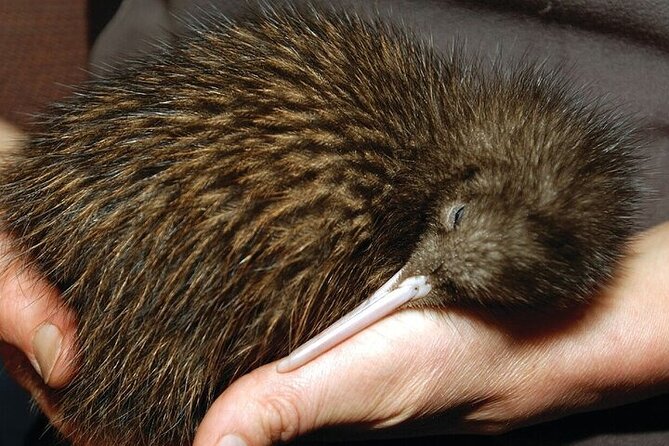
The tour also includes kiwi bird watching. That makes the Te Puia stop more varied. In a short visit, you move from geysers and mud pools to native wildlife, then to carving, weaving, and the Māori village.
The guide-led structure helps you understand how these pieces fit together. Without that structure, Te Puia could feel like several unrelated attractions in one large area. With only 1.5 hours, you will likely appreciate having someone direct your attention to the key places.
Keep in mind that kiwi viewing is included as an activity, but the supplied details do not promise a particular viewing result. Wildlife sightings can never be treated as a guarantee. The value is in having the opportunity built into the Te Puia visit.
What the $284.84 price really covers
At $284.84 per person, this is not a budget day trip. The price makes more sense when you add up what is included: Auckland city-center pickup and drop-off, an air-conditioned vehicle, professional driver-guide, WiFi, bottled water, snacks, all taxes and handling charges, entry tickets, and guided tours at both destinations.
You are paying for transport as much as admission. Driving from Auckland to Waitomo, Waitomo to Rotorua, and back to Auckland would take a large part of your day and require your own vehicle. The tour removes that responsibility and lets you focus on the two main sights.
It is also useful for anyone who does not want to book separate Waitomo and Rotorua activities. The convenience is real, especially if your Auckland stay is short. You can see two major North Island attractions without changing hotels.
The value is weaker if you already have a rental car, plenty of time, or plans to spend several days in Rotorua. In that case, you might prefer to visit Te Puia at your own pace and give Waitomo its own day. This tour earns its price through transport, organization, and access to both places in a single day.
Lunch is the main extra cost to remember. Snacks and bottled water are supplied, but lunch is not. Bring money or food for the day, and do not assume the café stop replaces a full meal.
Who should book this 12-hour outing
I would recommend this tour to you if you want the main highlights and have limited time in Auckland. It suits first-time visitors who do not want to manage long-distance driving, separate tickets, and two different day plans.
It is also a good match for couples, families with older children, and small groups who value a guided road trip. Children must be accompanied by an adult, and most people can participate, but the early start and long return should be considered carefully with younger children.
The tour is less suitable if you dislike early mornings, long vehicle rides, or tightly timed sightseeing. You also should not book it expecting a leisurely Rotorua day. The schedule gives you a clear introduction to Te Puia, not hours of independent exploration.
The group maximum of 19 gives the outing a more personal feel than a large bus tour. Still, the minimum of four people means the departure depends on enough bookings. That is worth keeping in mind if your plans are fixed.
Booking timing and cancellation details
This experience is often booked about 45 days in advance. That is a useful planning guide, especially if you are visiting Auckland during a busy season, although availability can change.
You receive confirmation when you book. Free cancellation is available up to 24 hours before the start time for a full refund. Changes or cancellations inside that 24-hour window are not accepted for a refund.
The tour also depends on suitable weather and a minimum number of participants. If poor weather or insufficient bookings causes cancellation, you are offered another date or experience, or a full refund. Cut-off times follow local time in New Zealand.
Should you book this tour?
Book it if you want Waitomo glowworms and Rotorua geothermal sights in one organized day, and you accept the early start, long drives, and limited time at each stop. The included admissions, driver-guide, Auckland pickup, snacks, and water make the $284.84 price reasonable for a visitor trying to cover a lot without renting a car.
Skip it if you have several days in the North Island or prefer slow, independent sightseeing. The tour is about efficient coverage, not lingering. For the right schedule, though, it gives you two very different New Zealand experiences: a dark cave lit by living points of light, then a geothermal valley shaped by heat and Māori culture.
FAQ
What time does the tour start?
The tour starts at 6:00 am.
Where does pickup take place?
Pickup and drop-off are offered in Auckland City Center. The activity ends back at the meeting point.
How long does the full experience last?
The tour lasts approximately 12 hours.
How long is the drive from Auckland to Waitomo?
The drive to the Waitomo Glow Worm Caves takes about 2.5 hours.
How long is the drive from Waitomo to Rotorua?
The drive from Waitomo to Rotorua takes about two hours.
Is lunch included?
No. Snacks and bottled water are included, but lunch is not.
What is included at the Waitomo Glow Worm Caves?
You receive a guided tour of the caves, including a flat-bottom boat ride on the Waitomo River.
What does the Te Puia visit include?
The Te Puia visit includes admission and a guided tour, Pohutu Geyser, boiling mud pools, Māori village areas, the National Carving and Weaving Institute, and kiwi bird watching.
Freshly added soaks in New Zealand
- West Auckland: Sunset with Thermal pool & Wine Tasting★ 5.0 · 3 reviews
- Whakarewarewa: Self-Guided Geothermal Trails★ 4.5 · 41 reviews
- WAI-O-TAPU Geothermal, Rotorua – Group Day Tour Ex Auckland★ 4.3 · 4 reviews
- Te Puia Geothermal, Kiwi and Māori Art★ 3.5 · 3 reviews
- Hells Gate Geothermal, Mud & Sulphur Spa★ 4.0 · 7 reviews
- Wai-O-Tapu Geothermal Valley, & Hot River★ 5.0 · 4 reviews
- Private, via beaches, Kiwi farm to Rotorua 8 lakes & Geothermal★ 5.0 · 20 reviews
- Tauranga: Mount Maunganui Hot Pools Experience★ 4.5 · 7 reviews
Cave & Canyon Hot Springs, compared.
Tiger Cave Temple, Emerald Pool and Hot Springs Tour
Read our review →
All day Krabi Jungle Tour (Hot Spring Water, Emerald Pool, Tiger Cave Temple)
Read our review →
Tolantongo Caves Hot Springs & Waterfalls Small Group Tour
Read our review →
Batu Caves,Waterfalls and Hot Springs Tour With Lunch
Read our review →
Roseau: Titou Gorge, Hot Spring, Falls & Champagne Reef Tour
Read our review →
Silver Circle Tour, Canyon Ride, & Thermal Baths
Read our review →
Shoreside Fun-Day with Titou Gorge, Hot Springs & Champagne Reef
Read our review →
Taupo: Orakei Korako Geothermal Park and Cave Entry Ticket
Read our review →More soaks worth the detour